Articles in this section
Panorama
Panorama feature enhances the tour experience by allowing you to set a 360° image as the starting point or any other location in your tour, providing users with a memorable and immersive view.
Functionality
To enable a Panorama, pull the toggle to the right (1) and choose + Add Panorama (2). If you've already created a Panorama in another tour, you can import it by clicking the three dots and selecting Import (3). An Export (4) option allows you to transfer the panoramic image with or without settings once uploaded to the space:
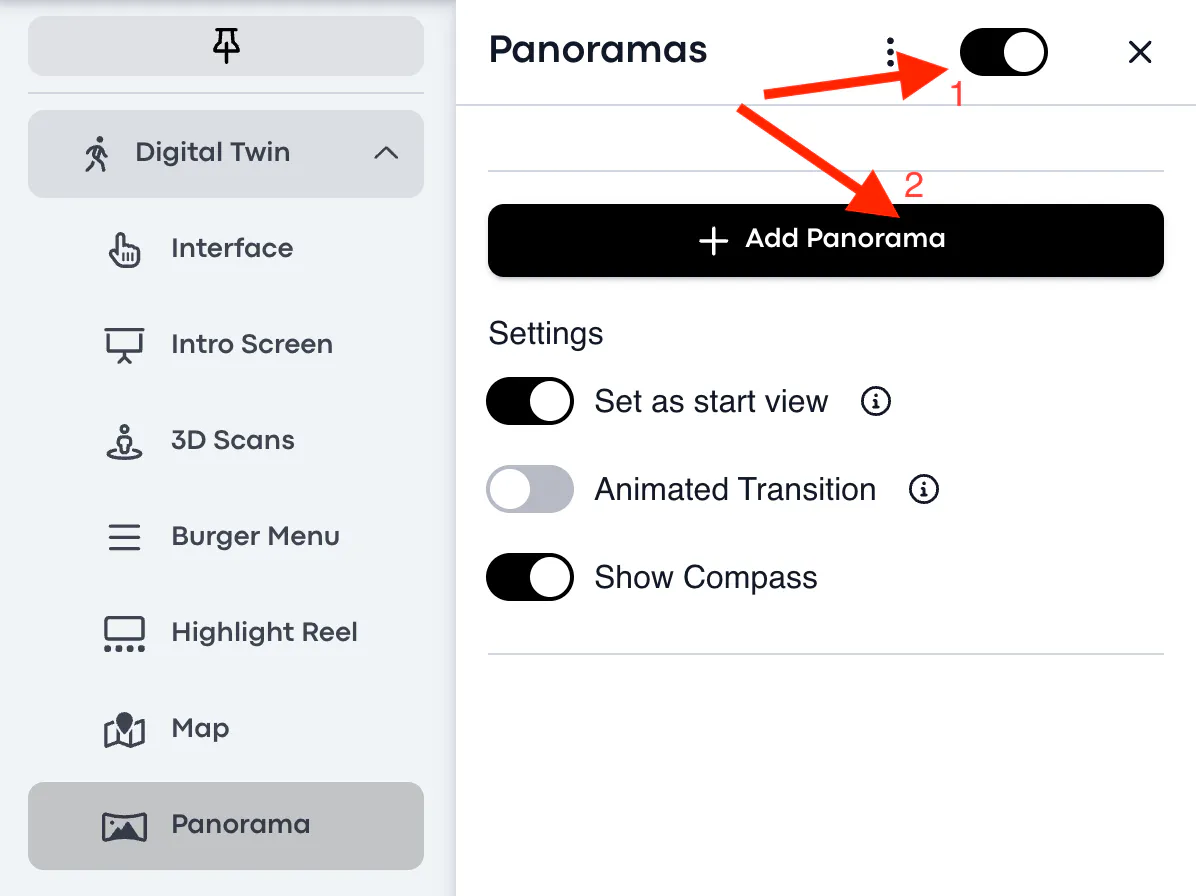
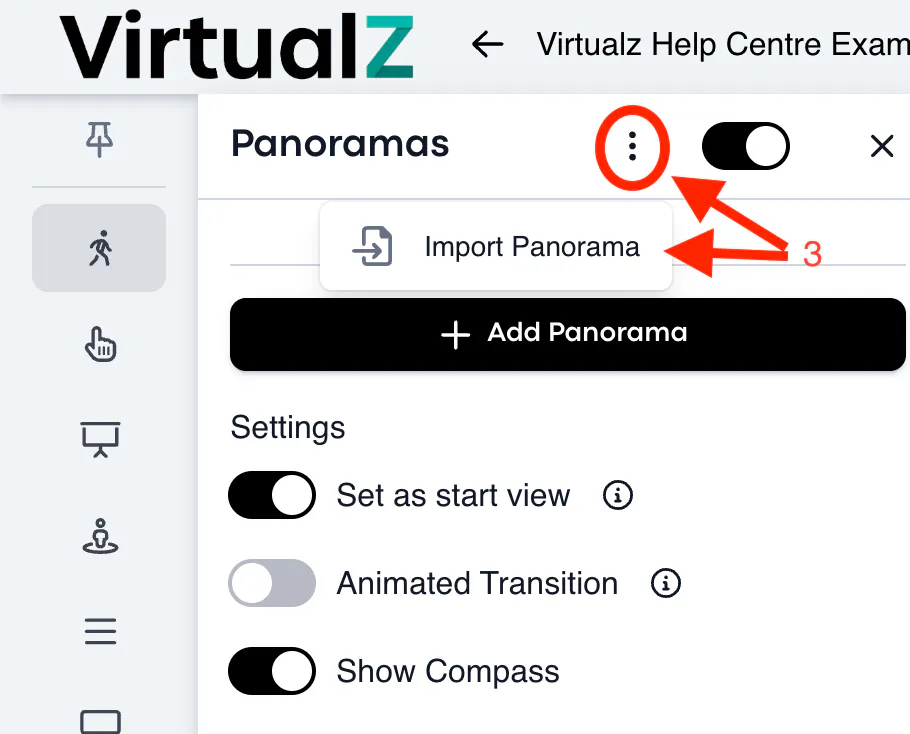
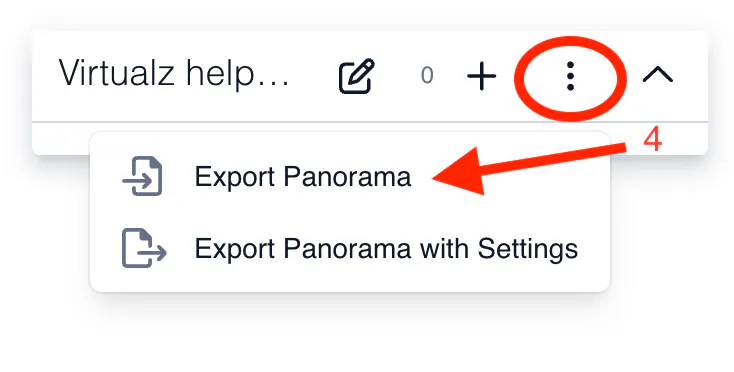
NOTE: currently the option to Export Panorama with settings is under development, therefore we advise using a regular Export Panorama option so far.
When adding a Panorama, you can choose from the following options:
- Set as start view - makes the Panorama the starting view for your space.
- Animated transition - creates a fly-over effect between multiple Panoramas added to the tour.
- Show compass - displays the compass directly on the Panorama view.
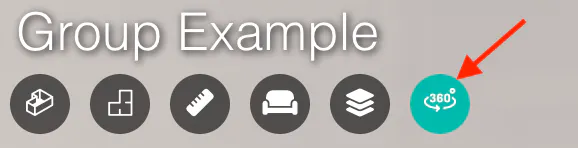
If the Panorama is not set as the starting point of the tour, it can be accessed by clicking the 360 icon in the bottom left corner:
Adding a Panorama
You can upload a panoramic image directly from your computer, or choose one from the tour library:
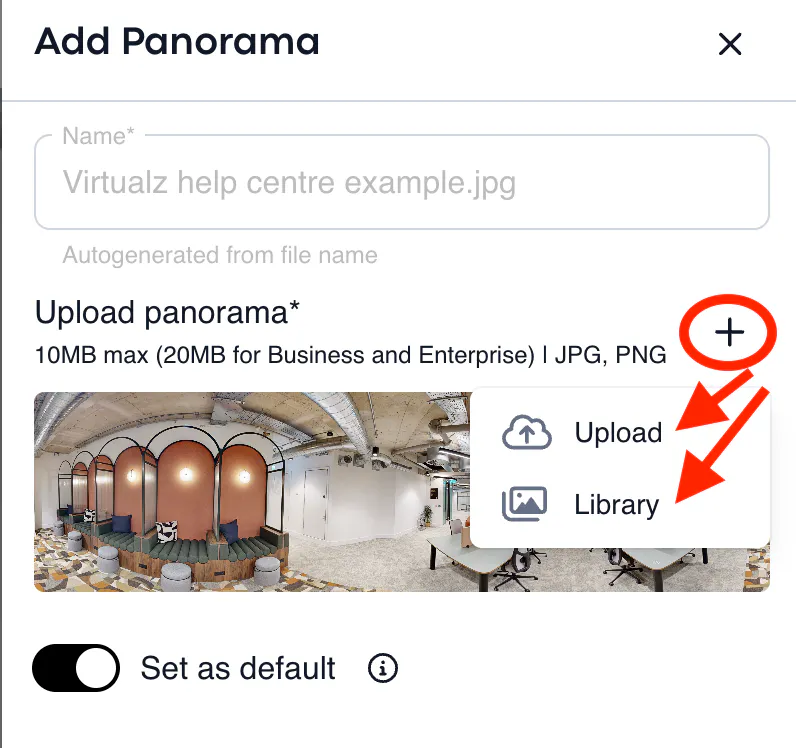
Please mind the format and size limitations according to your plan.
You can capture photos using any app, as long as the image quality is sufficient. We recommend images with a resolution of at least 8K (7680 x 4320 pixels). However, keep in mind that very high-resolution images can result in large file sizes, which may cause performance issues with the tour. To avoid this, try to stay within the recommended size limits for optimal performance.
- Set as default toggle allows you to select the 'main' panorama that will be displayed first when users enter the tour if your tour includes multiple panoramas.
When the panorama is uploaded and you want to make some edits or delete it, just hover over this panorama to find the hidden pencil:
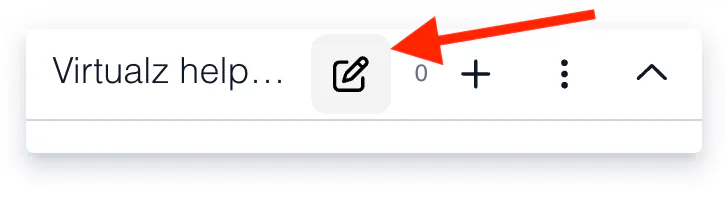
Start Point & Set North
When the Panorama is uploaded, decide on the following settings:
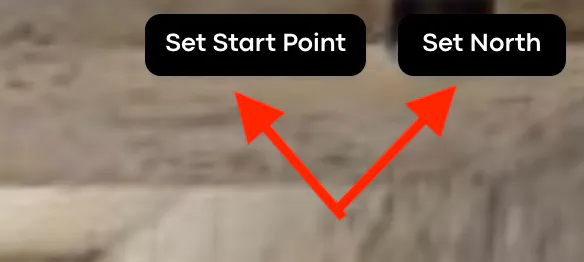
Set Start Point: сhoose a specific view angle of the 360° image to establish as the starting point when visitors enter the Panorama.
Set North: Align the compass for the 360° image to orient visitors, indicating the direction they are viewing within the Panorama.
Hotspots & Action Types
A hotspot is an interactive marker that you can add to your Panorama. It allows you to enhance your space by helping visitors orient themselves, highlighting nearby points of interest, promoting websites, playing audio, redirecting to other panoramas, and more.
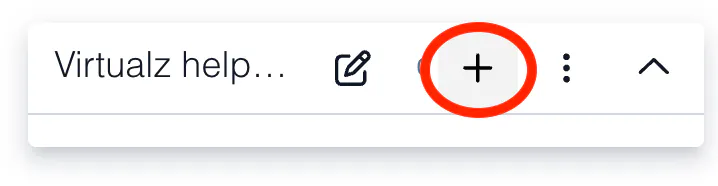
To add a hotspot, navigate through the panorama in the Workspace area to locate the "+" icon on the spot you want, then click the "+" button on your uploaded image to add the hotspot:
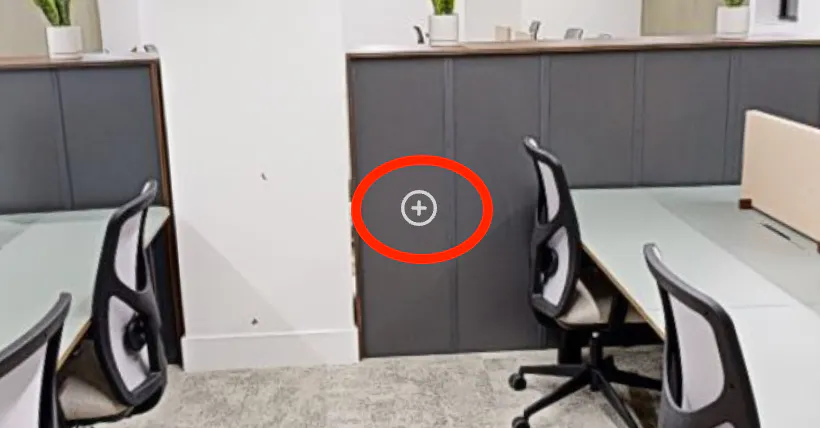
Now, for your hotspot, enter a name, choose an icon and color, and select the action type for it:
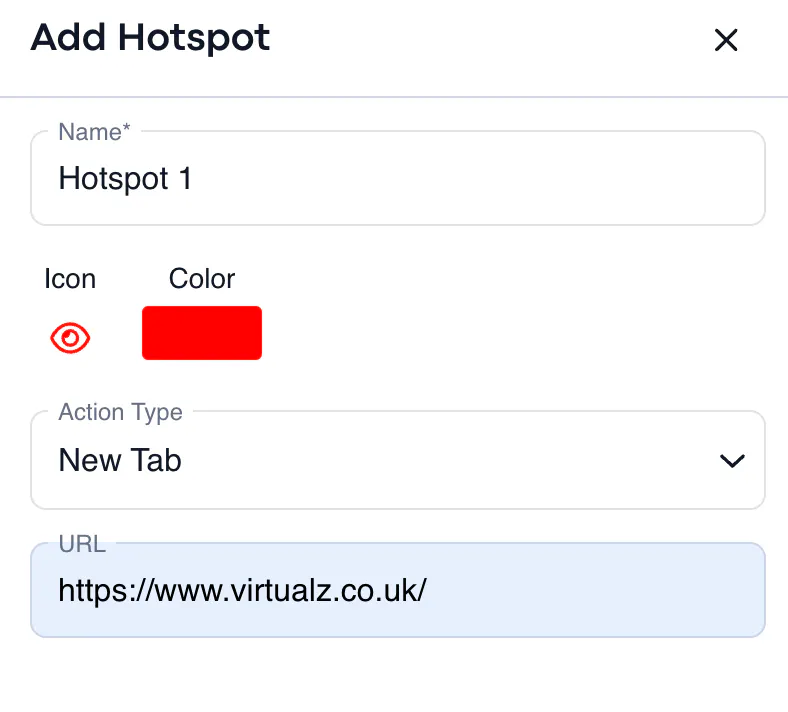
Action type is a specific action that can be assigned to the hotspot:
- Matterport (fly-over) - a fly-over transition from the dollhouse view to the selected in the Matterport tour (deep link can be retrieved by clicking U inside the Matterport tour);
- Matterport (instant) - redirects visitors instantly to a specific location within the Matterport tour, using a direct-entry effect;
- Tour link – redirects visitors to a specific location within the Virtualz tour. (The deep link for this can be obtained by pressing CTRL+Y inside the Virtualz tour);
- New Tab - opens the specified content in a new browser tab;
- Panorama - connects one panorama to another (make sure first to add the panorama images to be able to select it from the list);
- iFrame - embeds the external web- site content directly within the tour. Make sure to use iFrame Tester to verify if the link can be i-framed;
- Music - plays music when the panorama hotspot is clicked;
- Text - displays text upon clicking the panorama hotspot;
- Image - opens an image on the panorama;
- Video - starts a video embedded in the panorama (supports YouTube/Vimeo URLs).
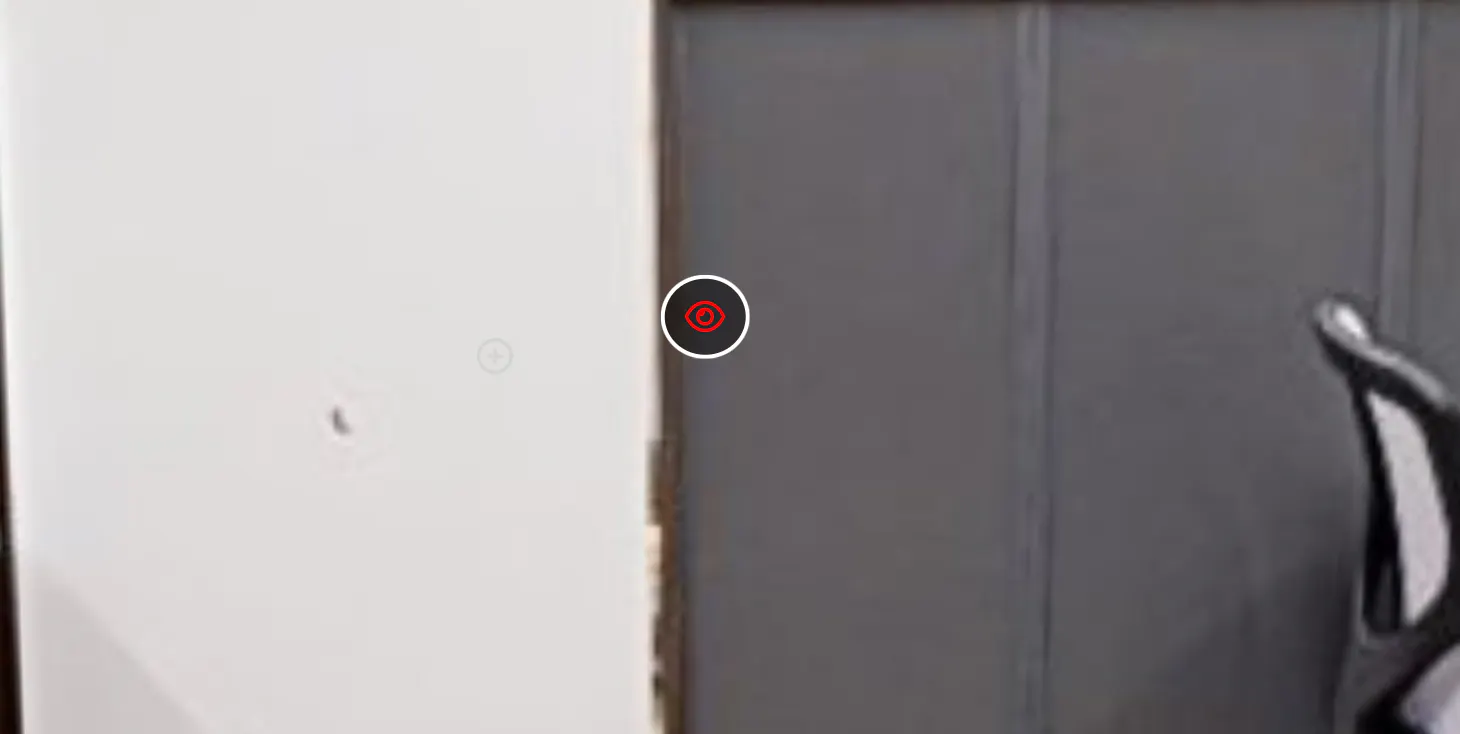
Here is how the hotspot with some action type will appear on Panorama:
Do not forget to save the settings when all panoramas and hotspots are added and set:
Important: sometimes when clicking the hotspot you may see the following notification Please wait for the tour to load, which requires you to click the hotspot again.
This is normal behavior. Panoramas are large files and can take some time to load, especially if the hotspots contain media content. If you stay on the panorama for a few moments, the hotspot should respond right away once the load is complete. If not, simply wait for the loading notification to disappear and then click the hotspot again.
Keep in mind that loading time may also depend on your device, browser, internet connection, or how recently you have cleared your cache and cookies.