Articles in this section
- How to add a tour to the system using the Matterport link?
- How to add a tour to the system if I don't have Matterport tour link?
- CGI: General overview
- Private Model Embed (PME)
- Who is User, Client, Agent and Collaborator
- Can I merge several spaces / tours into 1?
- How to get a deep link for location in the tour?
- How to Zoom in/out on the tour?
- Can I translate my tour into different languages?
- How to add music to the tour?
- Can I add the image / pdf file to the Burger Menu?
- Floor Plan: How to order?
- How to change the password?
- How to collect Leads from the tour?
- How to activate the Registration form for Experience tour?
- Types of Tour Error: Troubleshooting Steps
How to activate the Registration form for Experience tour?
If you would like Analytics to collect the names (or emails) of the users who visited the Experience tour, you can activate the Registration Form to enter the tour.
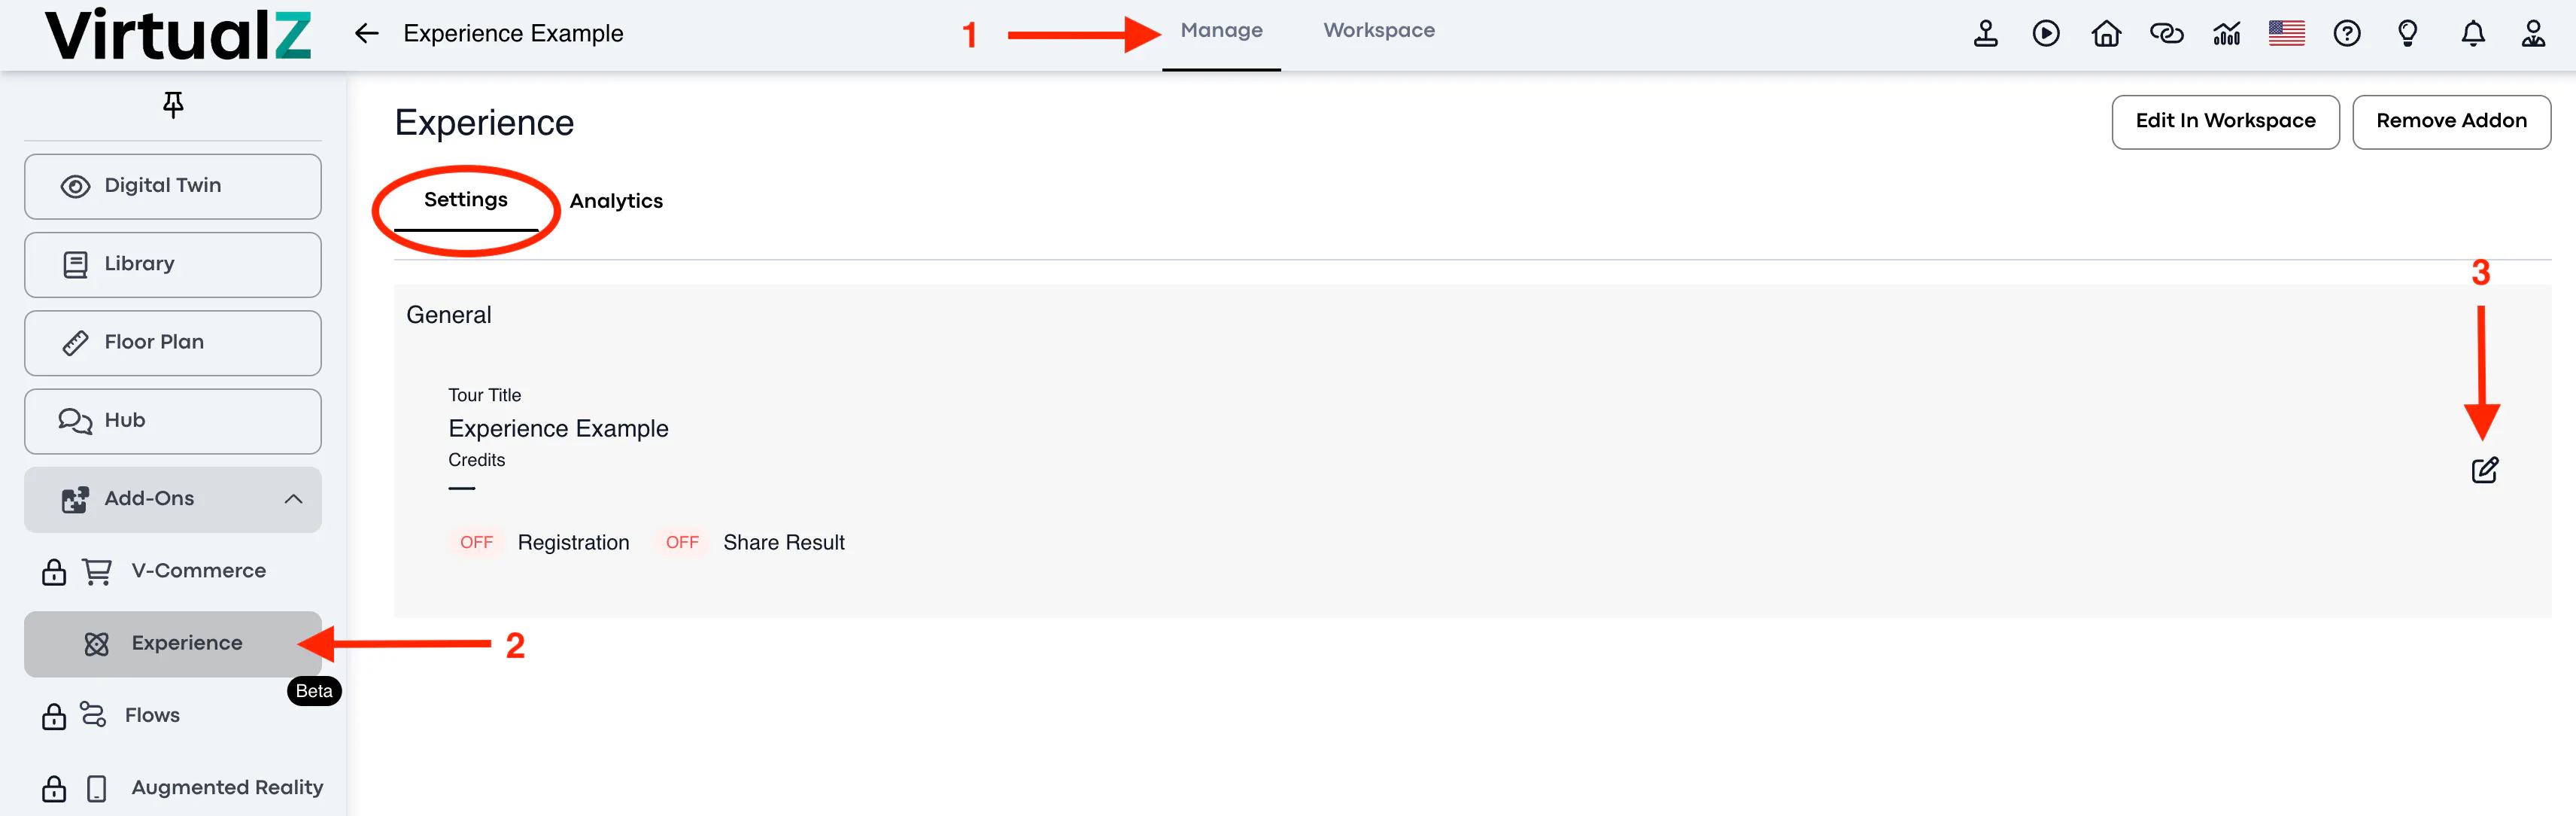
To activate the form, open (1) the Manage section of your Experience tour > (2) Experience add-on > Settings > (3) click on pencil to edit:
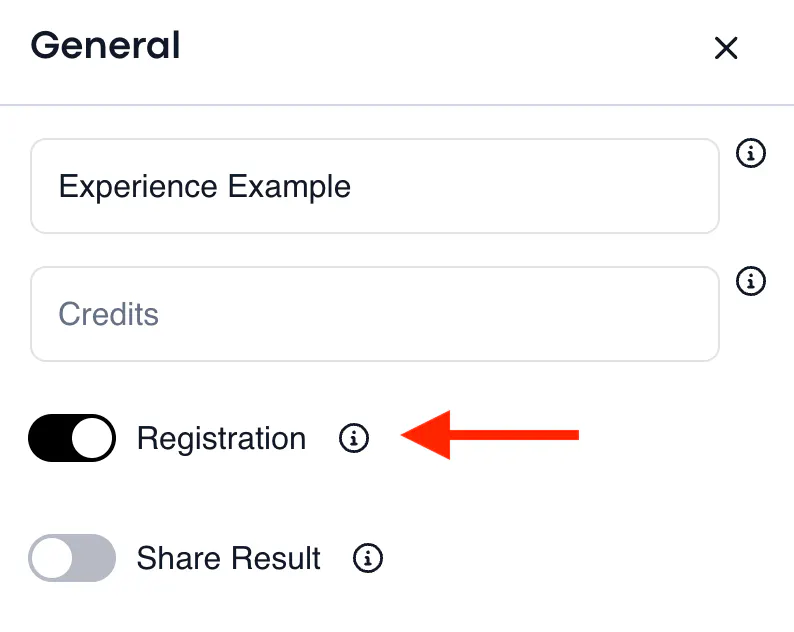
Turn ON the toggle for Registration Form. To complete all setups, enter the tour title and add any credits if needed.
You can also activate the Share Results toggle, if you want to allow the participants to share their results via email upon completing the virtual experience.
Once the settings are saved, the Registration Form is activated. Visitors will be able to fill in their name (and/or email next to the name) to enter the Experience tour.
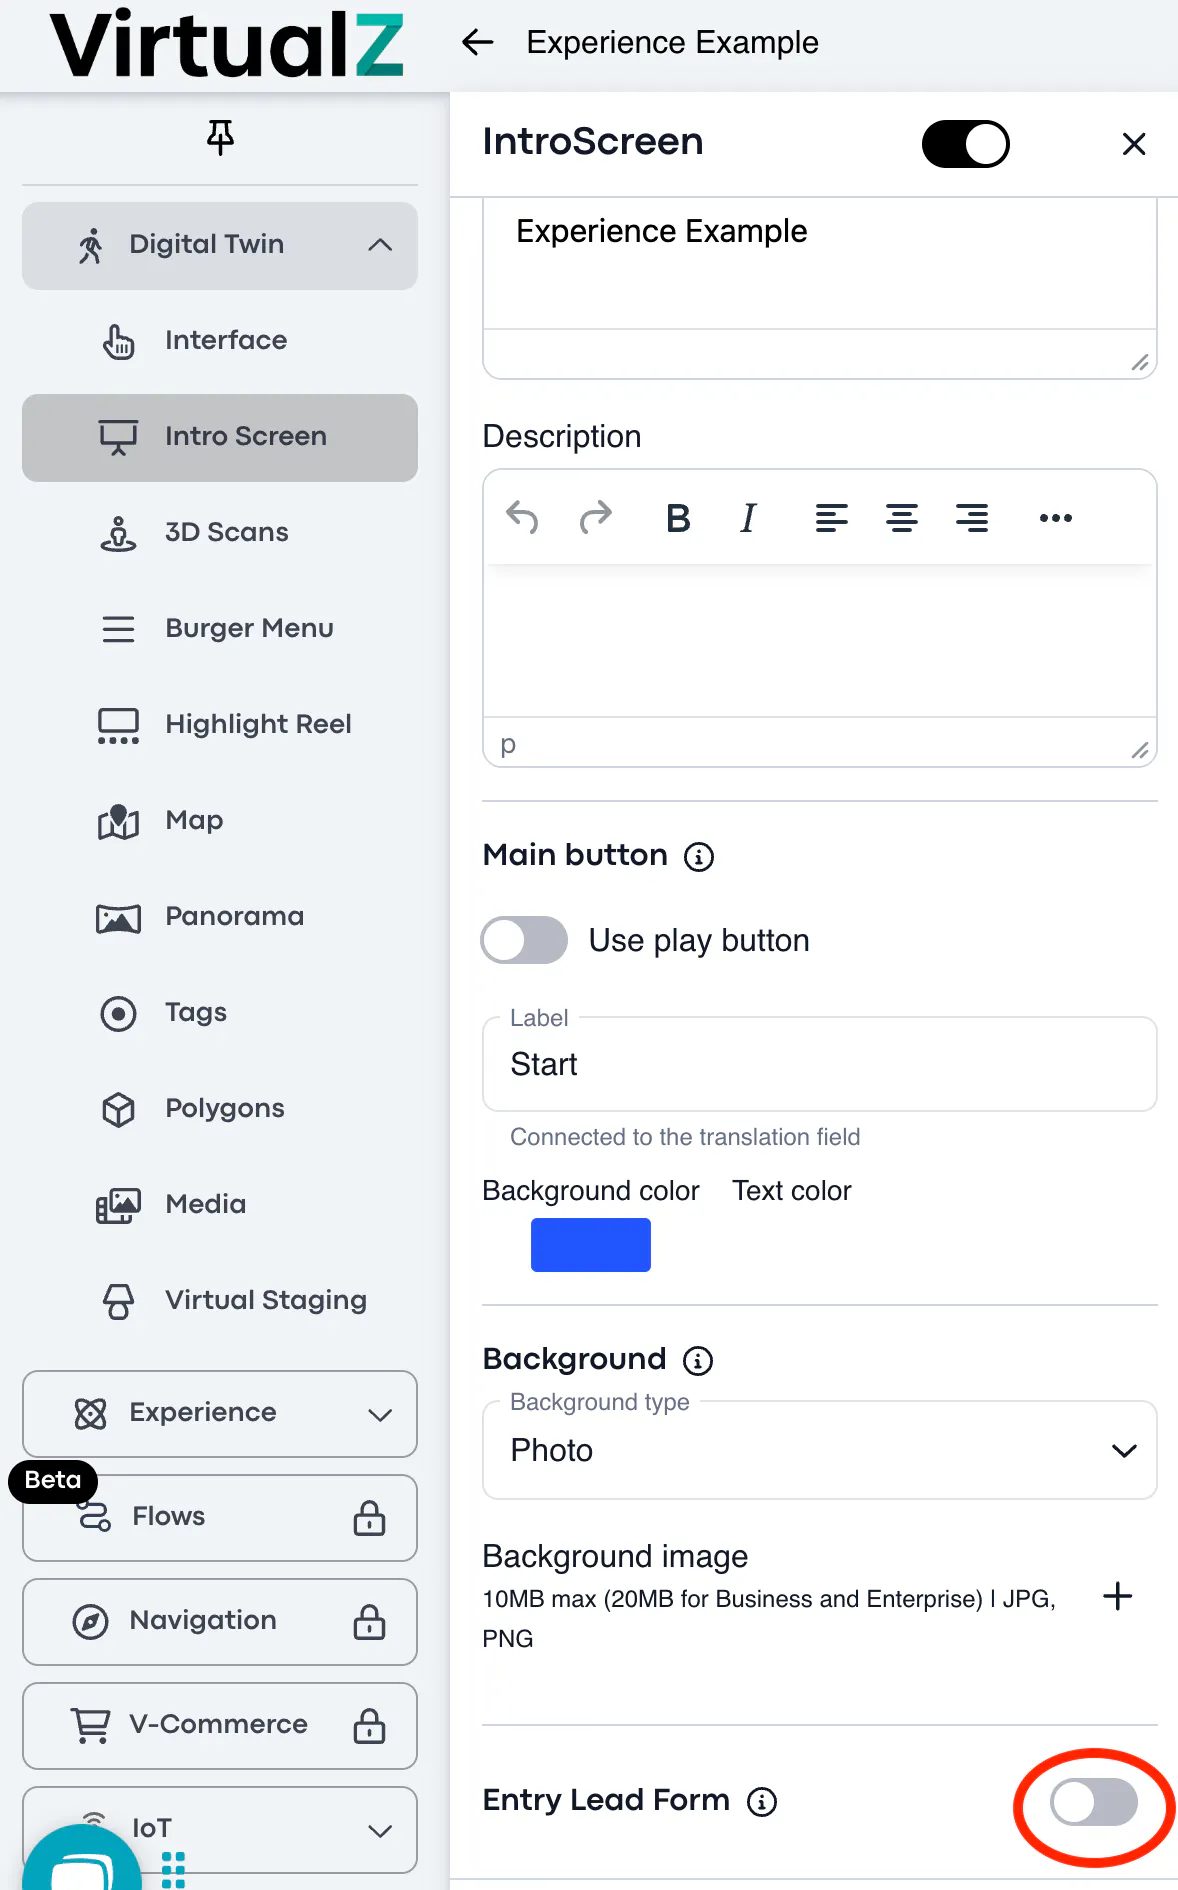
Note: If the Registration Form is activated for the Experience tour, make sure to disable the Entry Lead Form on the Intro Screen. Otherwise, two active forms will conflict with each other and may not function properly.