Articles in this section
- How to add a tour to the system using the Matterport link?
- How to add a tour to the system if I don't have Matterport tour link?
- CGI: General overview
- Private Model Embed (PME)
- Who is User, Client, Agent and Collaborator
- Can I merge several spaces / tours into 1?
- How to get a deep link for location in the tour?
- How to Zoom in/out on the tour?
- Can I translate my tour into different languages?
- How to add music to the tour?
- Can I add the image / pdf file to the Burger Menu?
- Floor Plan: How to order?
- How to change the password?
- How to collect Leads from the tour?
- How to activate the Registration form for Experience tour?
- Types of Tour Error: Troubleshooting Steps
How to add music to the tour?
Music can be added both to the whole tour and to the specific object or place.
Tour Background Music
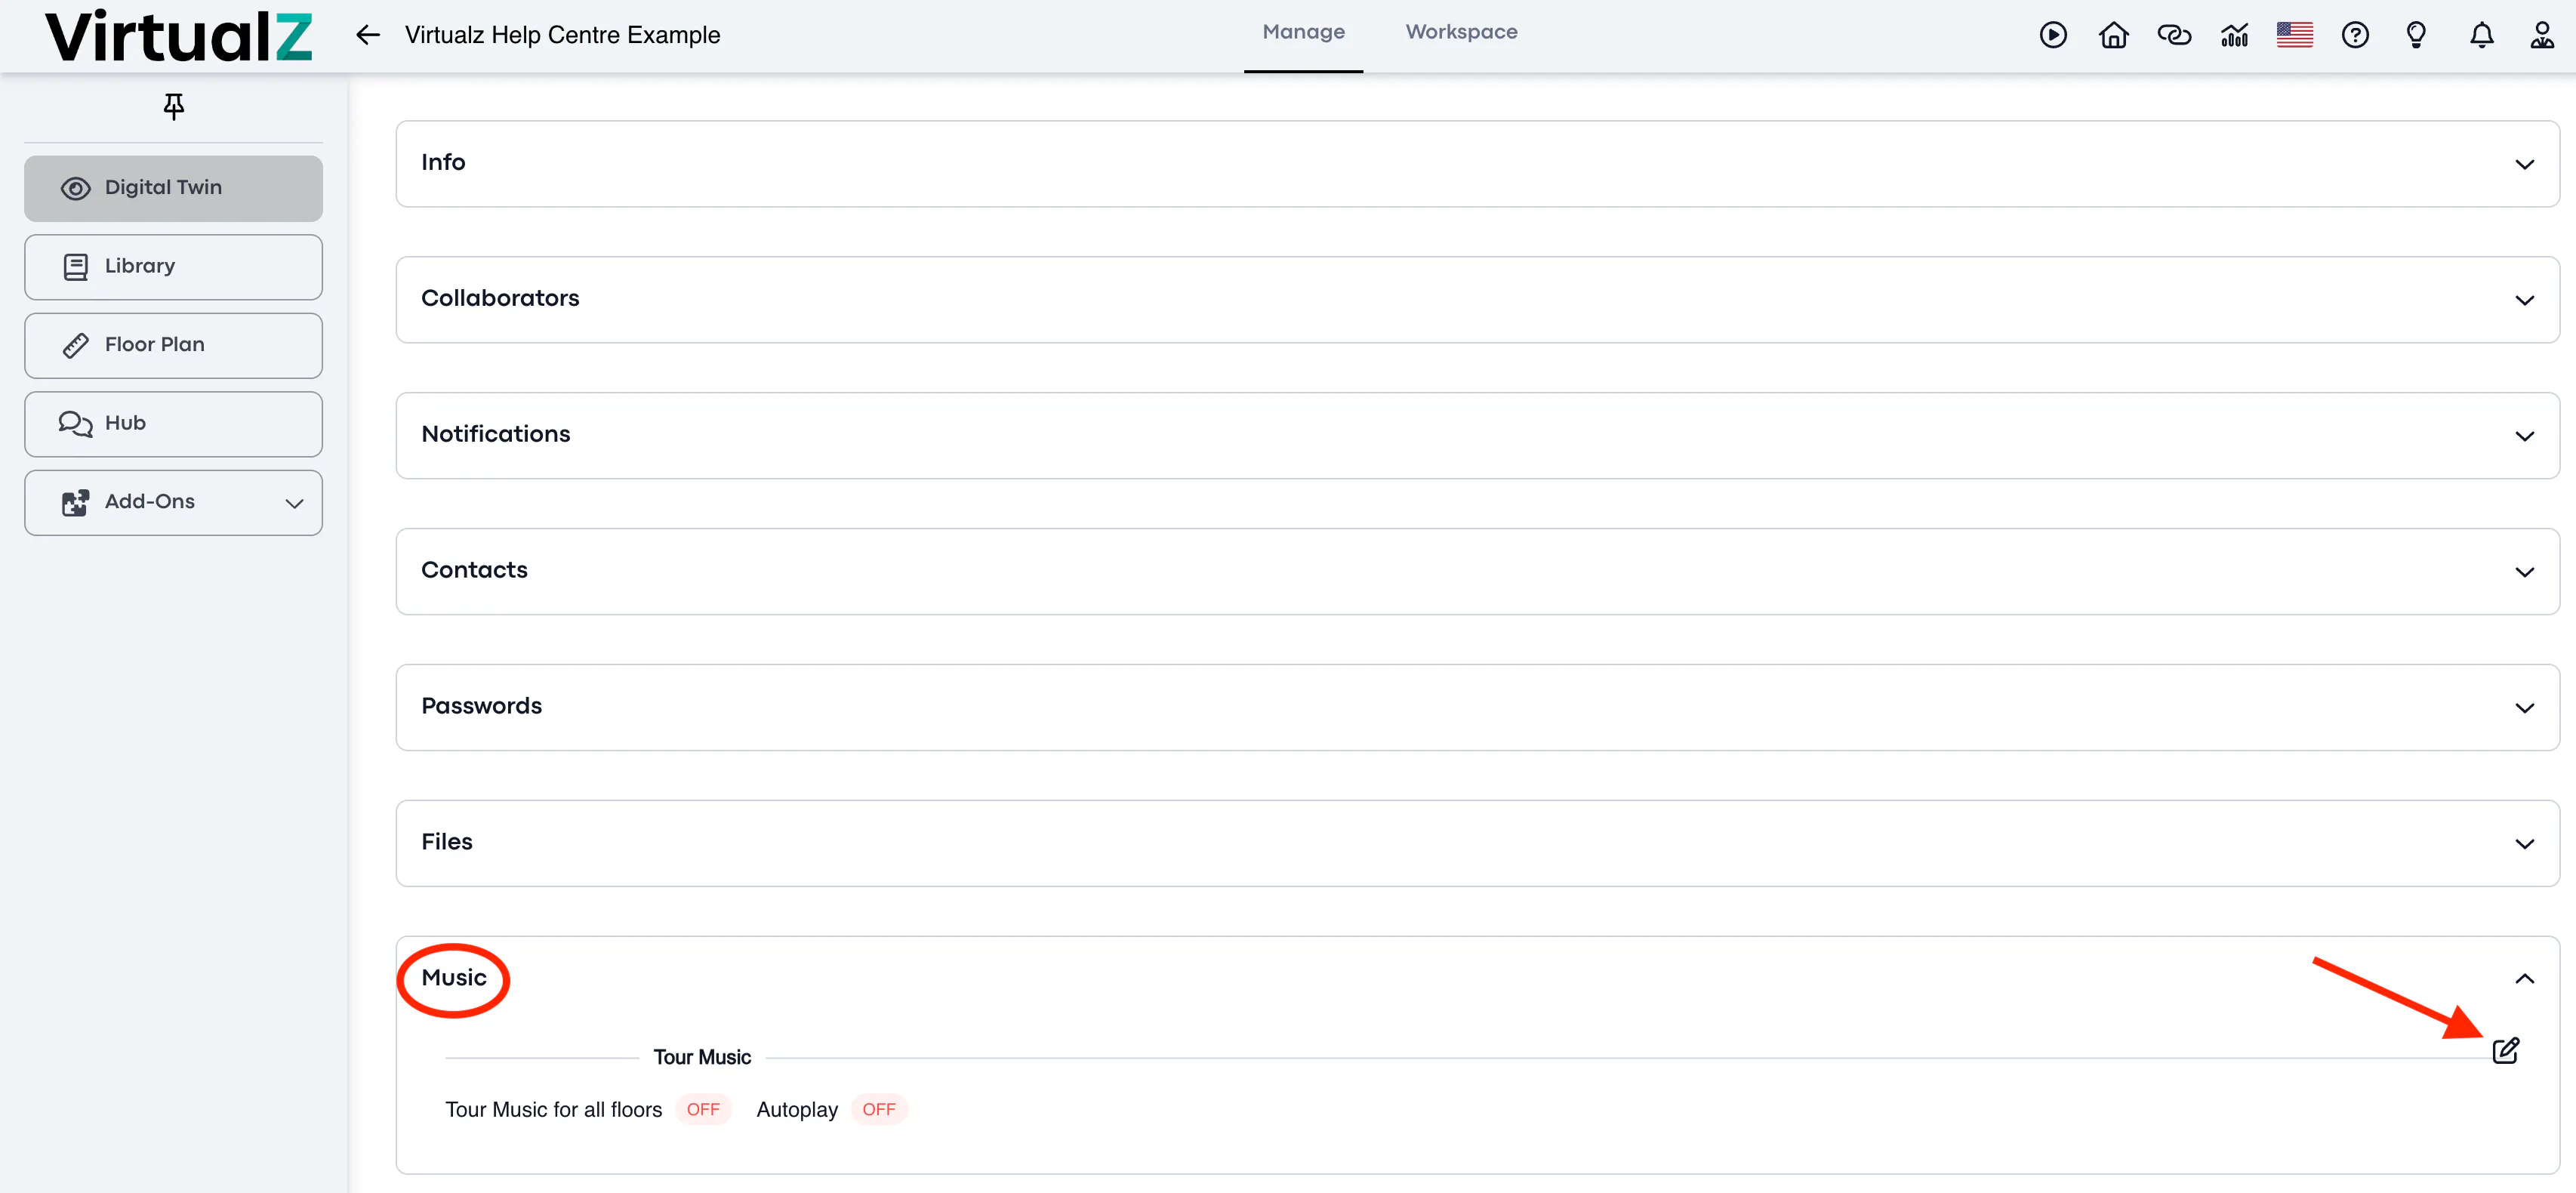
Open your tour's Manage section > scroll down to find 'Music' > click on the pencil to edit:
In the Edit form click on + (1) icon to upload a file from your computer or choose from the library, mind the size and formats that can be accepted:
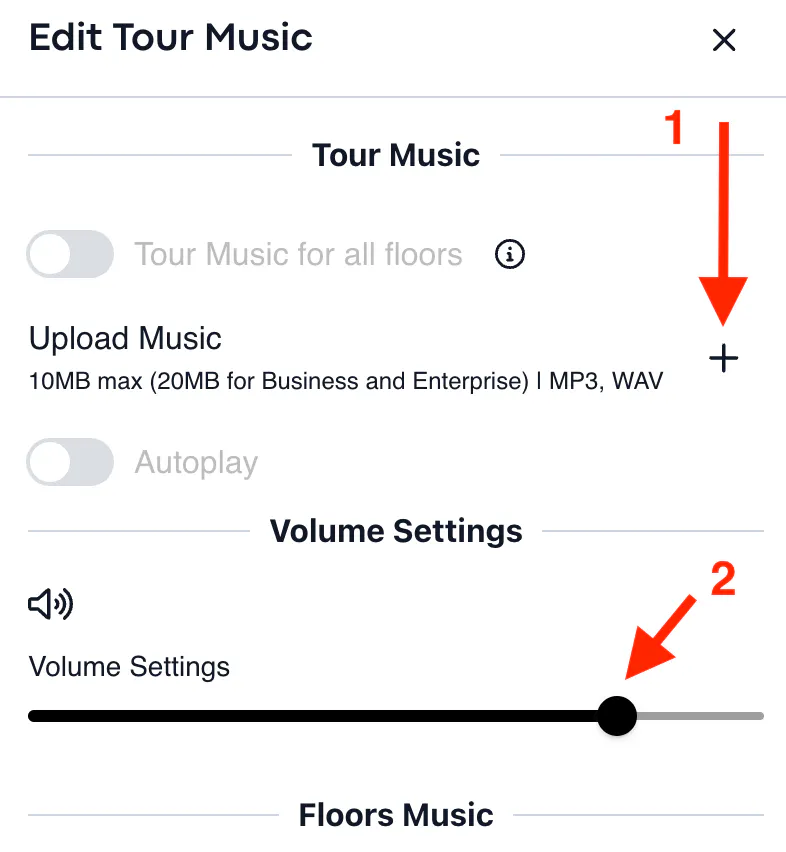
NOTE: Pay attention to set the Volume (2), as it is set to zero by default.
Once you added a music file, two toggles can be enabled:
Tour Music for all floors - enabling this option ensures that chosen music is played on all floors and takes precedence over floor music.
Autoplay - if you want the music to start upon entering the tour. Note: Due to browsers' Autoplay restriction policies, music will not start playing automatically but only after the first interaction with the tour (click or first move, swipe on mobile etc).
You can listen to your audio file, and regulate its speed (Clock button):
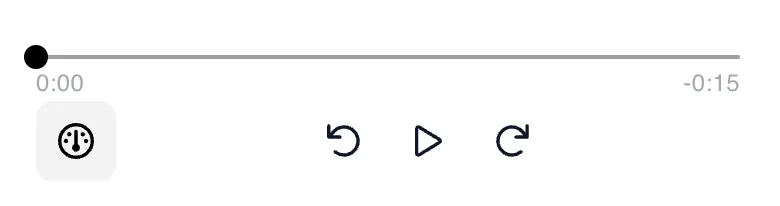
How to Control Music Playback Speed in the Admin Panel
When you click the clock icon for the first time, the music will play at a faster speed. A second click doubles the playback speed. With a third click, the track slows down. Clicking the icon a fourth time will return the music to its normal speed.
Please note that these adjustments only affect playback within the admin panel and do not influence how the music plays in the actual tour.
If you want to add different music to a specific floor, turn the Tour Music for all floors toggle OFF and upload music files separately to each floor:
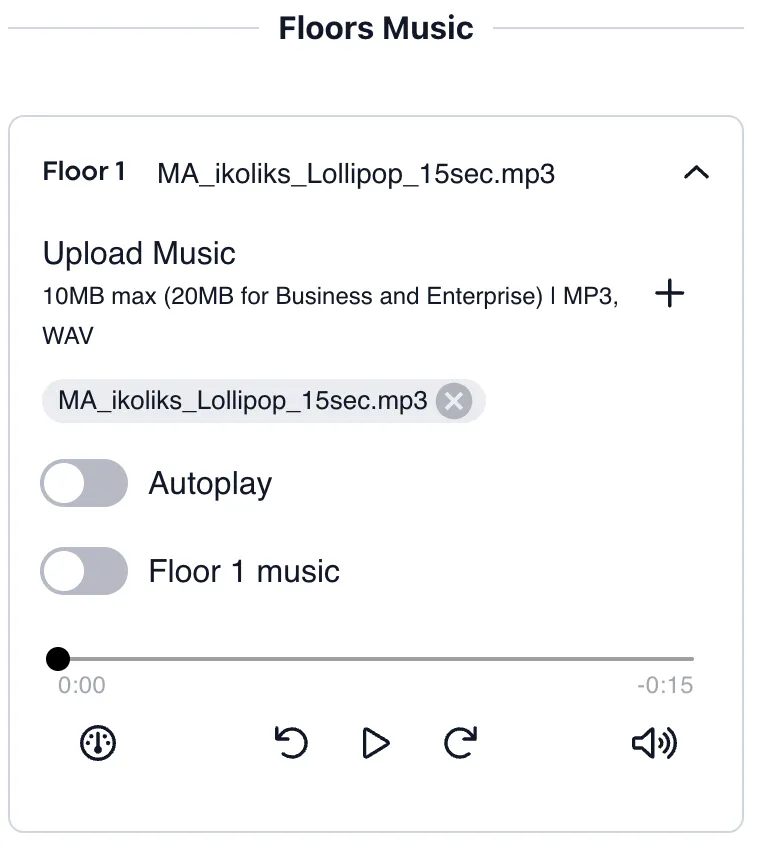
Do not forget to save the changes.
Music Uploaded to Object / Location
To play audio at a specific point in your tour, use the 3D Scans feature. Simply create a new group, select the desired scan(s) on the map, and choose the "Music" action type to upload your audio file. For detailed instructions, refer to the 3D Scans article.
IMPORTANT NOTE: To improve tour stability and loading times across devices, recent updates to our platform have disabled the ability to trigger actions, including music, on the first sweep of a tour. This change applies only to newly created tours, while long-existing tours remain unaffected.
If a music action is set on the first sweep, it will not function as expected and may cause issues, such as freezing on mobile devices. To ensure smooth performance, we recommend avoiding actions on the first sweep until final adjustments are implemented.
In case you need the audio playing upon interaction with the specific object/item, you may use the following feature:
The principle is the same as with 3D scans, you choose either a tag, or a polygon, or a particular media object in the tour, and when the viewer interacts with it - the audio will start playing. Click on the links above to find the guide on how to assign a Music action type to a tag, media, or polygon.